Encrypting messages and files with PGP
Arguing that you don’t care about the right to privacy because you have nothing to hide is no different from saying you don’t care about free speech because you have nothing to say.
– Edward Snowden
PGP encrypts a message by first creating a session key, encrypting the message with the session key, and finally encrypting the session key with the receiver’s public key.
The encrypted session key can now only be decrypted using the receiver’s private key, and the message can only be decrypted by the session key.
The message can also be signed, where the sender uses his private key to create the ciphertext that can be decrypted using his public key. We can then know for certain that the person sending the message is who he claims to be.
We can use this very nice and simple system to make communications over unencrypted channels (almost every social media platform, email, discord, etc.) a little less scary.
This post is not meant to be a proper explanation on the workings of PGP or any sort of encryption algorithm. All I’m doing is telling you how you can encrypt and decrypt messages to prevent your messages from being read by anyone other than the intended recipient.
GPG
I will be using GPG (GNU Privacy Guard) throughout this post. If you are
on Linux, you probably have it already installed. If not, look it up on
your package manager. If you are on Windows or MacOS (you really
shouldn’t be), you can use GPG4Win on Windows or
gnupg through Homebrew.
If you want a GUI, take a look at https://www.gnupg.org/software/frontends.html. We will be using the CLI.
Generating a key pair
A key pair simply contains the public key and the private key. You can generate a key pair interactively by running
gpg --gen-keyThis will ask you a few questions (name and email are for what you want others to see you as when they import your key; it doesn’t have to match reality), and generate a private key.
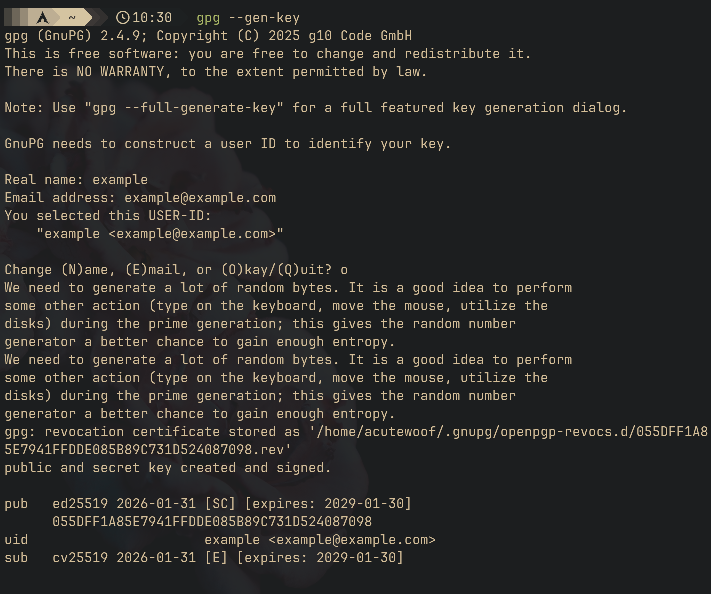
Once generated, you can export the public key by running, in the case of the example:
gpg --armor --export example@example.com public.key
--export is self explanatory, and --armor is
to convert the key to ASCII, which is commonly the format in which PGP
keys are shared. Remember to create a new key after the shown expiry and
to share it to everybody. Keys that don’t expire can be created through
the full generation dialog (gpg --full-generate-key) but is
not recommended.
Importing a key
You have now generated a key pair. Let’s say that your friend has also
generated a keypair. You can download his key, and import it with
gpg --import /path/to/key. For example, say I want to
import the example key I generated:

Your friend will have to do the same with your key on his machine if he wants to send you encrypted messages.
Encrypting a message or a file (and signing)
To encrypt a file (of any kind, including plain text), run
gpg --encrypt --recipient example@example.com --output /path/where/i/want/output.gpg /path/of/original/file
This will work perfectly fine for plain text as well, and can be
decrypted just the same. However, you might prefer sending an ASCII
version of the ciphertext when messaging instead of having to upload
each message as a file. For an ASCII output, you simply add
--armor and change the output file path to something more
sensible like .txt (the file extension really is irrelevant
to GPG).
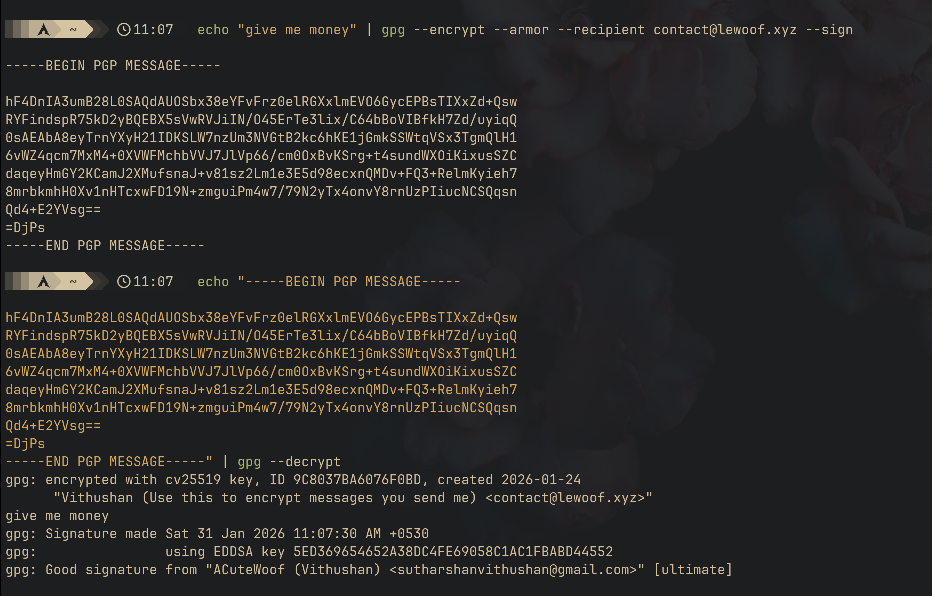
You might however not want to create a new file. In this case, you can pipe the output of echo into GPG and have it encrypt any string you want. For example, the following will print out the ASCII ciphertext:
echo "give me money" | gpg --encrypt --armor --recipient example@example.com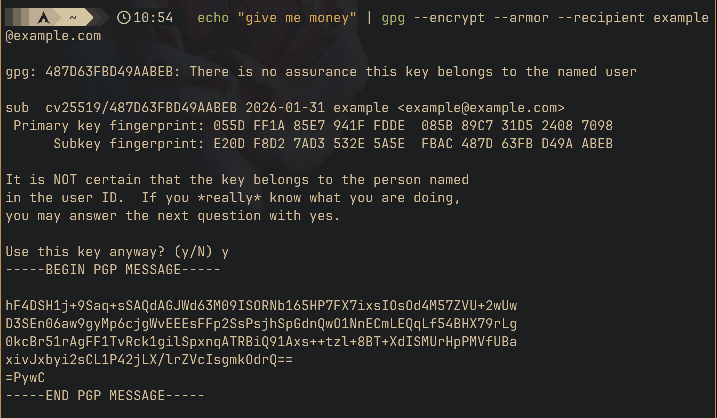
When encrypting, you would also want to add --sign to sign
the message, proving that the message is from your key pair.
Decrypting a message or a file
To decrypt a file, run
gpg --decrypt --output /path/where/i/want/original /path/of/encrypted/file.gpgThis will decrypt the file and save it to the specified output file.
Like for encryption, you can also pipe the output of echo to decrypt a PGP message:
echo "-----BEGIN PGP MESSAGE-----hF4DSH1j+9Saq+sSAQdAGJWd63M09ISORNb165HP7FX7ixsIOsOd4M57ZVU+2wUwD3SEn06aw9gyMp6cjgWvEEEsFFp2SsPsjhSpGdnQwO1NnECmLEQqLf54BHX79rLg0kcBr51rAgFF1TvRck1gilSpxnqATRBiQ91Axs++tzl+8BT+XdISMUrHpPMVfUBaxivJxbyi2sCL1P42jLX/lrZVcIsgmkOdrQ===PywC-----END PGP MESSAGE-----" | gpg--decrypt
If you want the message to be written to a file instead of printed, you
use --output
If the message is signed, GPG will show you information about the signer, which you can use to identify and/or confirm the sender.
bye bye
That should cover enough to get you started. You should read the docs for GPG.